Measuring
Start a measurement by sending method parameters to a PalmSens/EmStat device.
Creating a method
To run a measurement on your instrument, create an instance of a method that defines the parameters for the technique to run. See the .NET api reference for an overview of all techniques and their respective parameters.
To create an instance of a method in LabVIEW add a .NET constructor node to your block diagram.
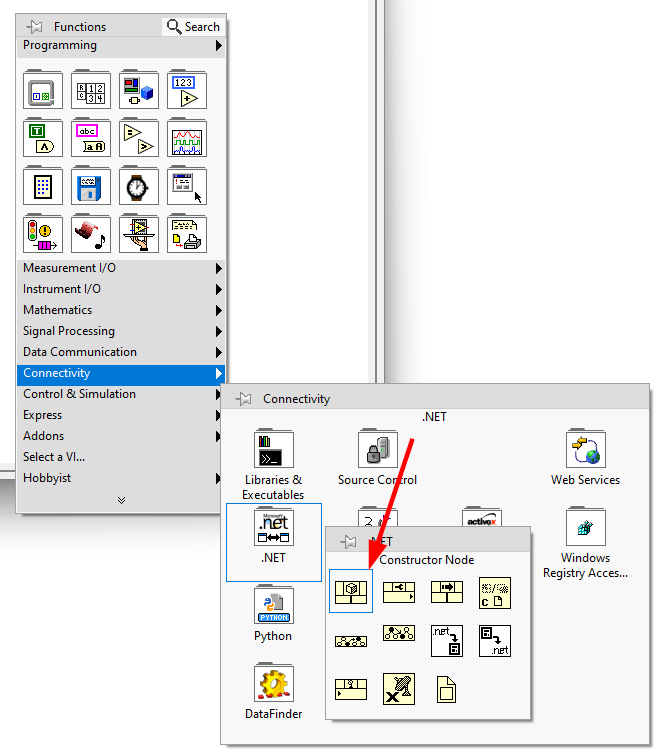
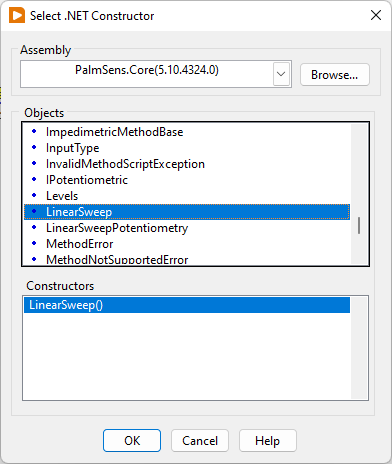
This will open Select .NET Constructor window. Drag the node to your block diagram.
-
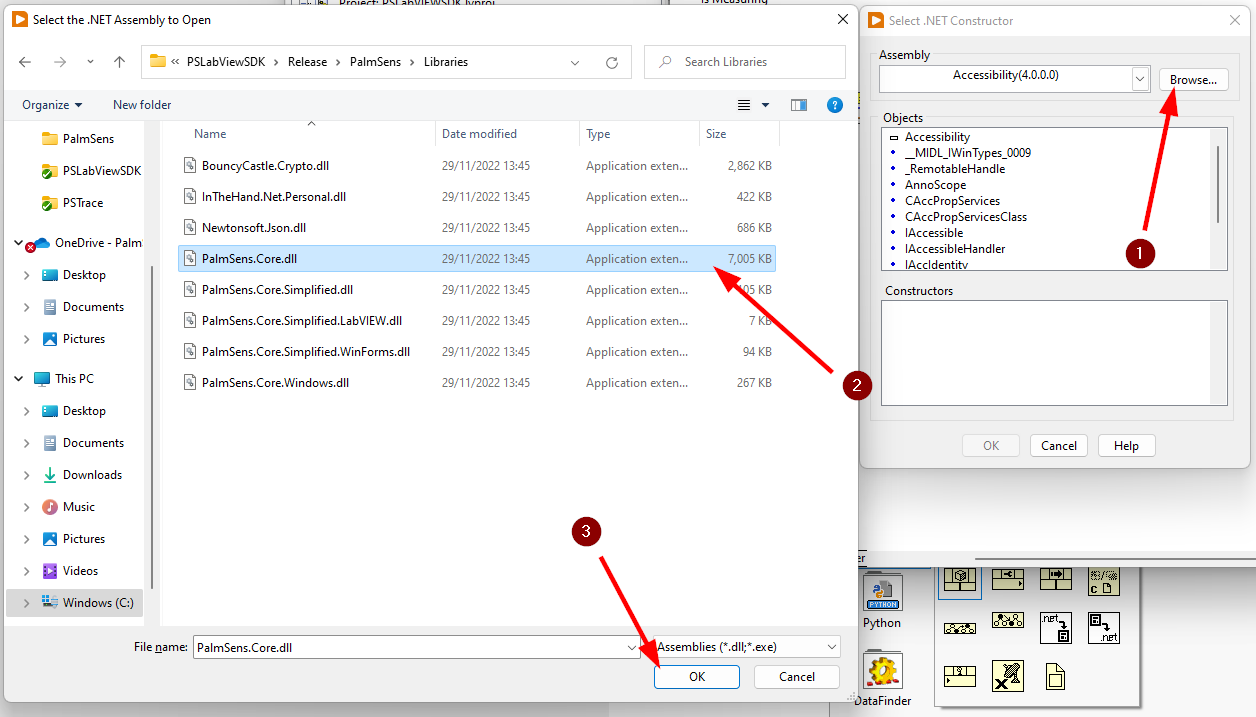
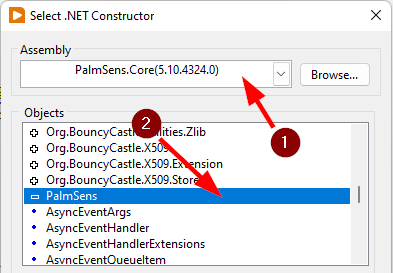
Open the node and click Browse...
-
Navigate to the PalmSens/Libraries folder included with the SDK and select the
PalmSens.Core.dll -
Click on OK.
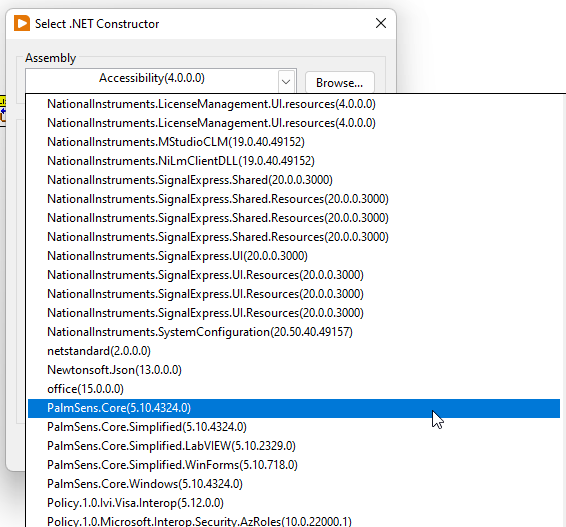
Alternatively you can select the PalmSens.Core Assembly from the dropdown list in the .NET Constructor Window.
Then double-click on the PalmSens.Techniques near the bottom of the list to expand it.
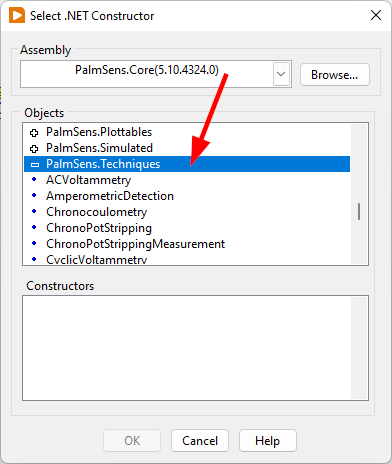
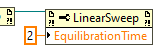
Select the technique you want to run and click on OK. See the .NET API reference and the PSTrace help documentation for more information. For this example we will use the Linear Sweep Voltammetry technique.
To define the parameters for a technique right-click on the constructor node, go to or any other parameter you want to set. The .NET API reference lists the relevant parameters for each technique.
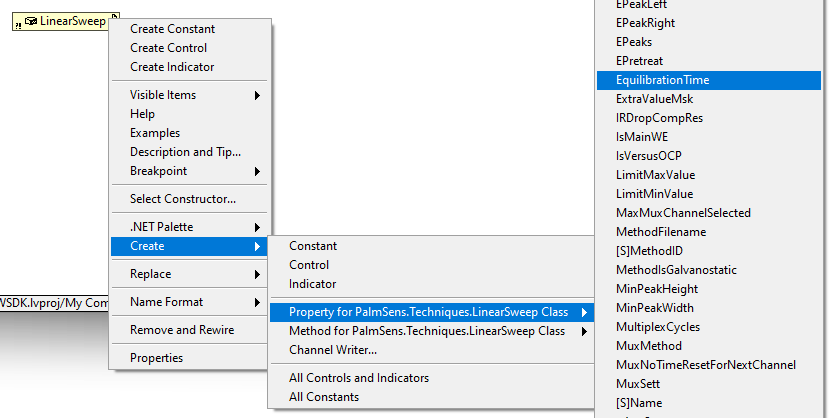
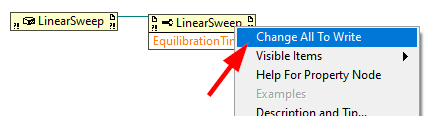
Connect the property to the constructor node and change it to write by .
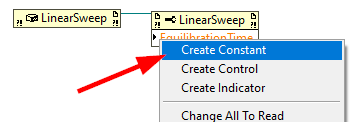
Then create a constant by and update the value.
|
|
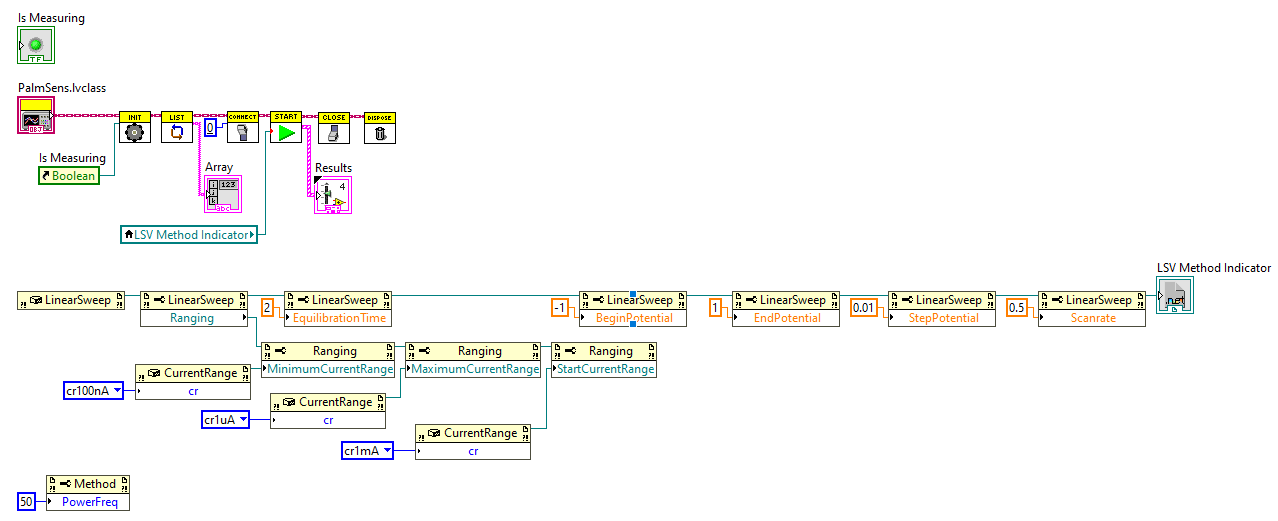
An example of what a configured method looks like.

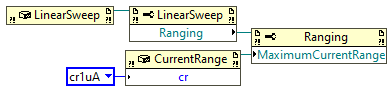
Current/Potential Ranges
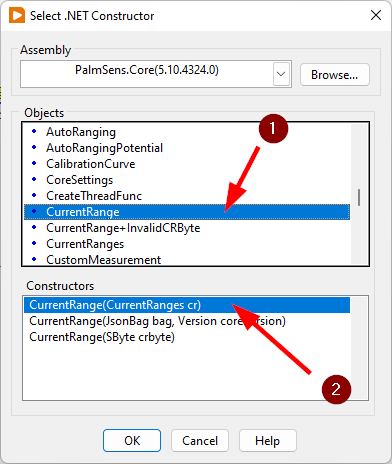
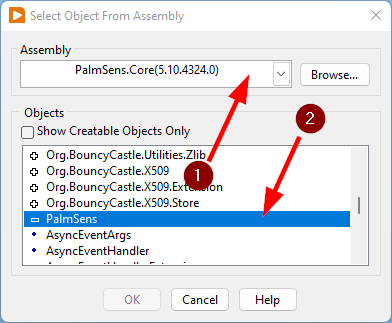
Current and potential ranges are respectively stored in the Ranging and RangingPotential parameters. To set the minimum, maximum, and starting range you will need to create an instances of the current/potential ranges by adding .NET constructor nodes.
-
Select the PalmSens.Core(…) assembly in the Select .NET Constructor window
-
List the current and potential objects by double-clicking on PalmSens.
-
Select
-
Click OK
To define a potential range, press instead.
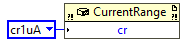
Add a constant value to the cr/pr node and select the range from the list.
These current ranges can then be set to the Ranging/RangingPotential Maximum, Minimum, and Start parameters.
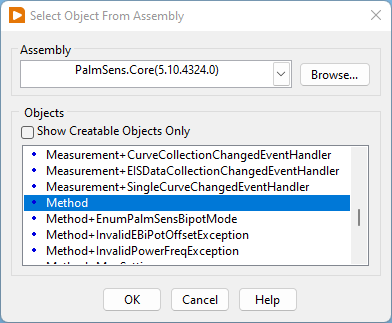
Mains Frequency
To eliminate noise induced by other electrical appliances it is highly recommended to set your regional mains frequency (50/60 Hz) in the static property PalmSens.Method.PowerFreq.
Add a .NET property node to your Block Diagram.
|
|
-
Select the PalmSens.Core(…) assembly in the Select .NET Constructor window
-
List the current and potential objects by double-clicking on PalmSens.
-
Select Method
-
In the Block Diagram, click on the property and select PowerFreq.
-
Set the value to integer 50 or 60

|

|
Running a measurement
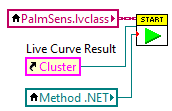
To run a measurement you must be connected to an instrument, and need an instance of a method To run a measurent drag and drop the Measure function VI from the PalmSens lvclass into your block diagram and connect it to the PalmSens class.
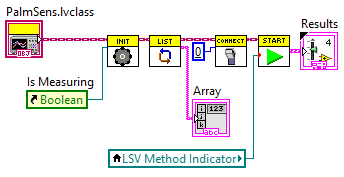
Make sure to connect the method to the input.
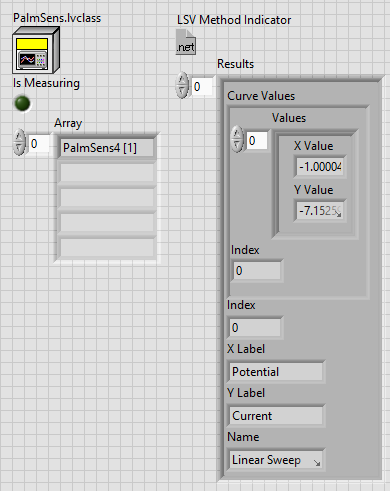
The output can be stored in an indicator, the easiest way to view the results is to right click on the ouput node and select create indicator.
The type of the output is defined in MeasurementResults.ctl, it is a set of x and y values with strings for the name and units.
Similar to PSTrace, a linear sweep voltammetry measurement will give you one set of current and potential values. A cyclic voltammetry measurement will give you multiple sets of current and potential values corresponding to the amount of scans. And, a chronopotentiometry / amperometric detection measurement will give you a set of current and time values. When extra values are also recorded these will return as additional sets of x and y values and the same applies to multiplexer scan results.
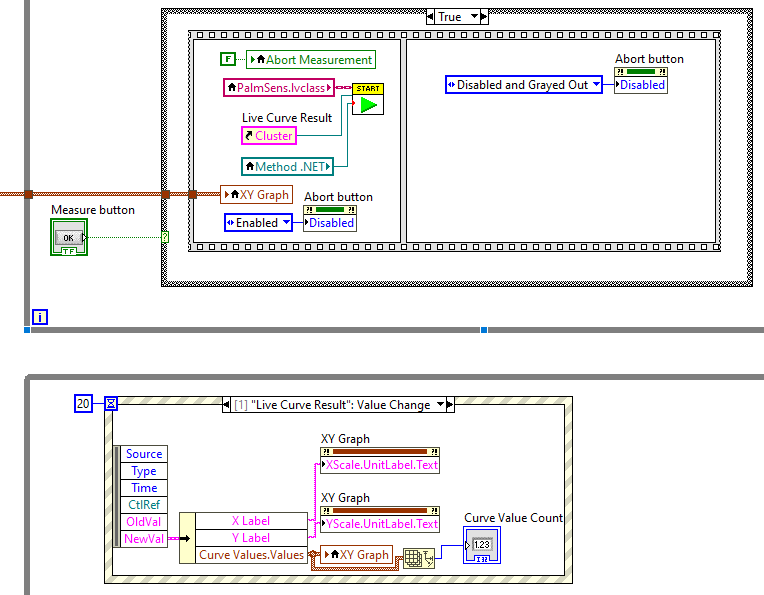
The final diagram and front panel of the BasicExample VI.
|
|
|
Blocking behavior of Measure function
The Measure function will block the VI until the measurement is complete, for more information on this refer to API reference and the BasicUIExample VI`. |
Live interaction
When a measurement is running the VI or measurement loop will be blocked until the measurement is done. This section and the BasicUIExample VI show how to work around this to plot/process results in real-time and abort a running measurement.
Visualization
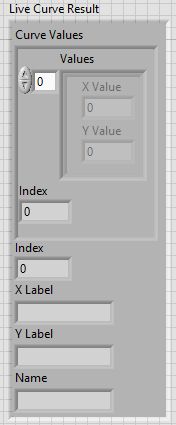
The Measure function VI has an input terminal to which you can connect a reference to an indicator of the cluster defined in the LiveCurveResult.ctl type definition.
You can add this by dragging and dropping the LiveCurveResult.ctl on to your front panel.
|
|
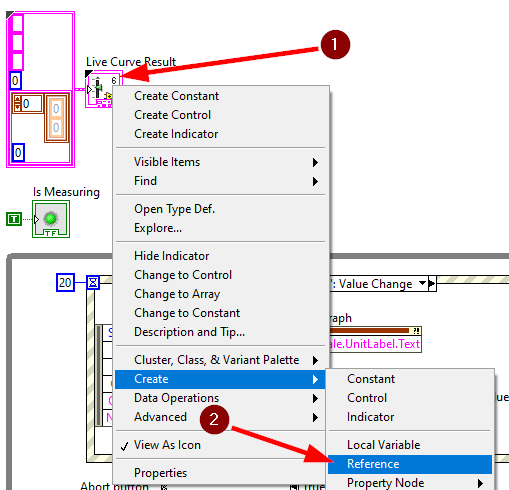
-
Go to the indicator for the
LiveCurveResultin the block diagram. -
. The resulting reference can then be connected to the
Measurefunction VI.
The values of the LiveCurveResult will be updated during while the measurement is running and LabVIEW receives a signal for each of these updates.
The event block allows you to execute something each time a signal is received.
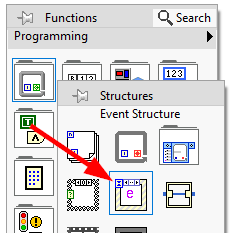
To receive measurement data in real-time the Event Structure should be placed inside a loop.
|

|
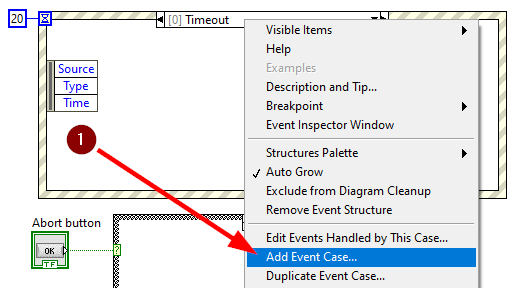
The Event Structure has a timeout event setup by default. If you want to use the loop containing the Event Structure for other things, we highly recommended to define the timeout of the Event Structure in the top left corner.
|
|
-
Next you will need to add an Event Case to the Event Structure.
-
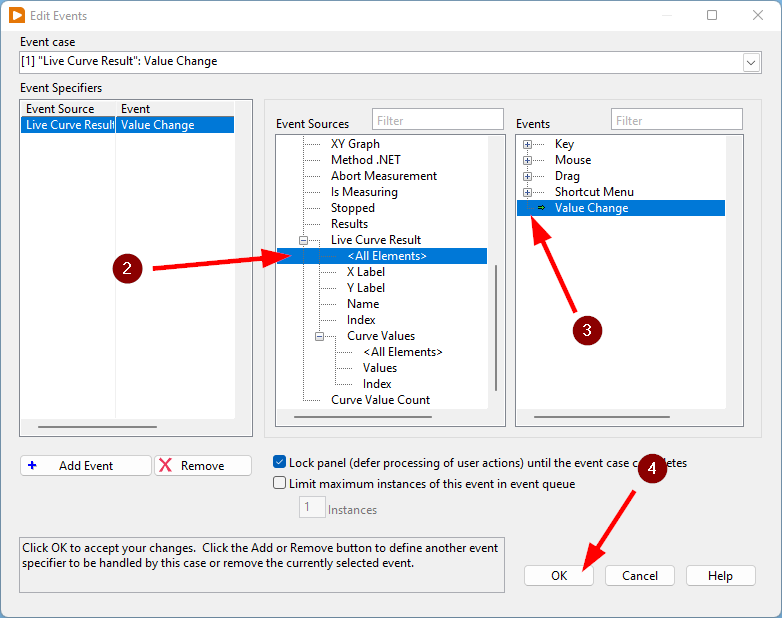
In the Edit Event window, select
-
Select
-
Click on OK.
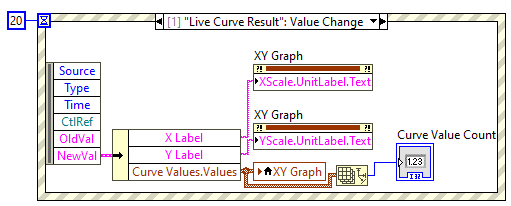
The BasicUIExample VI uses this Event Structure to update the plot.
To be able to visualize/process these results the Measure function VI and event structure cannot be in the same loop.
Abort a measurement
To add the functionality of aborting a running measurement, drag and drop the AbortMeasurement function VI from the PalmSens lvclass into your block diagram.

Make sure that the AbortMeasurement function VI and the Measure function VI are placed in separate loops.
Otherwise, the most likely scenario will be that LabVIEW will postpone executing the abort command until after the measurement is finished.
This also applies applies to the Disconnect and Dispose function VI commands and any other UI or blocks that you want to be able to execute in parallel to a measurement.